Pre-requisites
- Some basic understanding of terminal
- Basic terminal knowledge of
mkdir, cd, ls, mv etc is sufficient.
- Have experience in common python packages, jupyter notebook.
- Have launched jupyter notebook from terminal
- Docker installed
- Check that you can run in your terminal
docker --help or which docker.
Problem Intro
As a data professional,
- you want to make sure your work is reproducible.
- Or if you are leading a team or is working on a project with a team,
- if you are developing your data products and want to make sure moving to production is as seamless as possible,
How to you make sure the OS, system, packages installed are consistent across environments?
On a personal note, i struggled with learning docker (as a math graduate only knowing R/Matlab).
I (personally) wished that there was a tutorial that could leverage on my existing skills set.
This is my attempt at explaining docker to a Data Scientist (DS) or Data Analyst (DA).
Hello-world!
Something most DS/DA would be familiar with is jupyter notebooks. Lets use it as our Hello-world!
Hands on! (this might take a while to run)
docker pull continuumio/anaconda3
output:
68ced04f60ab: Pull complete
57047f2400d7: Pull complete
8b26dd278326: Pull complete
Digest: sha256:6502693fd278ba962af34c756ed9a9f0c3b6236a62f1e1fecb41f60c3f536d3c
Status: Downloaded newer image for continuumio/anaconda3:latest
docker.io/continuumio/anaconda3:latest
You have just downloaded a docker image!
Docker images
Hands on! - In your terminal, run:
docker images
output:
REPOSITORY              TAG                 IMAGE ID            CREATED             SIZE
continuumio/anaconda3   latest              bdb4a7e92a49        3 months ago        2.7GB
In layman terms, an "image" is simply a "snapshot". Think of it this way, you bought a new computer,
and installed some software on it, and created a backup of the computer. That backup, is an "image".
Docker containers
A docker container is the instantiation of the docker image, you can think of it as a remote computer/server. In layman terms, you took your "image" (backup), installed it in a new computer and start running it. That new computer is your "container".
Now, we want to try to launch jupyter notebook and connect to our local machine, we need to connect the ports.
Hands on! - In your terminal, run:
docker run -it -p 8888:8888 continuumio/anaconda3
To check your containers that are running, open up a new terminal, run:
docker ps
output:
CONTAINER ID        IMAGE                   COMMAND             CREATED             STATUS              PORTS                    NAMES
948a08294e07        continuumio/anaconda3   "/bin/bash"         3 seconds ago       Up 3 seconds        0.0.0.0:8888->8888/tcp   strange_banzai
Notice the docker container id 948a08294e07.
Jupyter Notebook
In your docker terminal, create a new folder, change to that directory, and launch jupyter notebook like so:
mkdir workenv && cd workenv &&
jupyter notebook --ip 0.0.0.0 --port 8888 --no-browser --allow-root
output:
    To access the notebook, open this file in a browser:
        file:///root/.local/share/jupyter/runtime/nbserver-12-open.html
    Or copy and paste one of these URLs:
        http://948a08294e07:8888/?token=3ba6fa51fc63eea0f387e0d994fe7847e9efcbd799685234
     or http://127.0.0.1:8888/?token=3ba6fa51fc63eea0f387e0d994fe7847e9efcbd799685234
Try out your new remote docker development!
To stop your jupyter notebook and exit out of docker container, either:
- close the terminal (Not recommended)
- stop the notebook (
control-c) and run exit in the docker shell.
- In your other terminal,
docker stop 948a08294e07.
Now your docker container is no longer running, but still exists as a container that you can still restart it:
docker start 948a08294e07
And to access the bash terminal:
docker exec -it 948a08294e07 bash
Dockerfile
In the earlier steps, we run command line by line, ideally we like to "script" it out. This is where Dockerfile comes in.
In layman terms, a Dockerfile is a set of instructions to follow when building the image.
In addition, we will be switching to miniconda (to reduce the footprint).
Create a file directory, with the following files and content:
Chop Chop! (Hurry up!)
Code has been prepared for you, just copy and run in your terminal!
You still need check and/or create the appropriate directory though.
Dockerfile code
Every Dockerfile starts with a FROM statement. In this case, we pull/use an image from continummio as done previously.
The 4.8.2 is pointing to a docker tag. To check the tags available, head over to docker hub for continummio/miniconda3
here.
For example, If you always want the latest image available, use continuumio/miniconda3:latest.
After pulling the images, the rest is just the order of code to execute in building the image.
Below is a quick summary of the commands for reference.
| Command |
Purpose |
| FROM |
base image |
| COPY |
copy files to docker |
| EXPOSE |
port to expose |
| WORKDIR |
the base directory of docker |
| RUN |
run commands inside docker,
eg pip install |
| ENTRYPOINT |
configure how container will run |
| CMD |
last command to run |
Note: there are best practices for writing Dockerfiles.
Docker build
Now, instead of running step by step, you would use docker build -t <image name> <directory of dockerfile>
For example:
docker build -t docker_notebook .
You will notice that the downloading size is significantly smaller, and the logs for python installations.
Docker run
docker run -it -p 8888:8888 docker_notebook
output:
ll kernels (twice to skip confirmation).
[C 17:45:49.437 NotebookApp]

    To access the notebook, open this file in a browser:
        file:///root/.local/share/jupyter/runtime/nbserver-7-open.html
    Or copy and paste one of these URLs:
        http://3fd39bacaf20:8888/?token=f34ed4d8c57bd22e5f0a343657364100a9af983aac56a4a6
     or http://127.0.0.1:8888/?token=f34ed4d8c57bd22e5f0a343657364100a9af983aac56a4a6
Feel free to create your own notebook and run some simple code. Remember to exit your docker session.
Volumes mount
Now, you might be wondering:
- How do i access my training data?
- One way is to add / copy the data to the image, but what if your data changes?
- Do you have to rebuild the docker image everytime your data changes?
- How do i export the notebooks or python scripts locally to my machine (and then use git)?
This is where volume -v option comes in.
Run:
docker run --rm -it -p 8888:8888 \
-v $(pwd)/workenv:/workenv \
 docker_notebook
Similarly, access the jupyter notebook and see your files there! Try to create a notebook. I named mine create.ipynb.
You will see that the notebook is also created in your local environment, including all changes.
Note:
- The
--rm flag tells your system to remove your container once you exit the session.
This is to make sure you do not store data in your container to prevent 'mishaps'.
- You also can have multiple mounts, including your credentials (example later).
Remember to exit your docker session.
Managing secrets & env variables
Sometimes your local directory you have secret configs (such as db passwords) and you use gitignore
to prevent the secrets from uploading to github.
Similarly, in docker, you have .dockerignore.
As for env variables, during docker run, use the -e or env-file flag.
Example:
- Create
.dockerignore with the contents in the tab box below
- Create
secrets/env_vars with the contents in the tab box below
Build the docker file again:
docker build -t docker_notebook .
and access the bash:
docker run --rm -it -p 8888:8888 \
--env-file ./secrets/env_vars \
-e db_table=hellothere \
-v $(pwd)/workenv:/workenv \
--entrypoint bash \
docker_notebook
and to check that the secrets is not copied even though your Dockerfile specified COPY . $HOME
cd ..
ls | grep secrets
There should be no secrets folder in your ls (or secrets folder is empty).
As for the var variables, launch ipython and run the following:
import os
os.getenv('db_table') #hellothere
os.getenv('password') #password
os.getenv('dbname') #superdb
Remember to exit your docker session after finishing up this section.
Using a json file
Suppose your docker service is using a service account or a json key,
and you need that key in the docker container at development time,
You can place the key.json in the secrets folder mount it as a volume, like so:
docker run --rm -it -p 8888:8888 \
--env-file ./secrets/env_vars \
-e db_table=hellothere \
-v $(pwd)/workenv:/workenv \
-v $(pwd)/secrets:/secrets \
--entrypoint bash \
docker_notebook
Similarly, exit your docker session.
Additional Notes
We used this command earlier, entrypoint. A common confusion/question is what is the difference between
RUN, CMD and ENTRYPOINT. I found this to be a nice guide.
Cleanup
Run the following in order:
| Command |
Description |
docker stop $(docker ps -qa) |
Stop all containers |
docker rm $(docker ps -qa) |
remove all containers |
docker rmi $(docker images -qa) |
remove all images |
Other Examples
Docker Python runs
Run the code in Chop Chop! tab to follow along:
Example1: Simple python script eg1.py.
docker run -it dockerpy
output:
hello world!
Example2: Using sys.args in eg2.py:
docker run -it dockerpy eg2.py hello there
output:
This is my first arg hello and this is my second arg there
This is the second arg there and this is the first arg hello
Example3: Using argparse in eg3.py:
docker run -it dockerpy eg3.py --greet hello --name myname --animal beef
docker run -it dockerpy eg3.py --greet hello --name myname --animal beef --animal chicken --amount 10
output:
Namespace(amount=4, animal='beef', message='Hi there i have')
['--greet', 'hello', '--name', 'myname']

Namespace(amount=10, animal='chicken', message='Hi there i have')
['--greet', 'hello', '--name', 'myname']
Run this script in your terminal (or paste it in a setup.sh and bash setup.sh in your terminal)
mkdir docker_py
cd docker_py
cat << "EOF" | pbcopy
FROM continuumio/miniconda3:4.8.2
EXPOSE 8888
WORKDIR $HOME/src
COPY . $HOME/src

ENTRYPOINT ["python"]
CMD ["eg1.py"]
EOF

echo "$(pbpaste)" > eg1.py


cat << "EOF" | pbcopy
print("hello world!")
EOF

echo "$(pbpaste)" > eg1.py

cat << "EOF" | pbcopy
import sys
#notice that when using sys.arg the index starts from 1
string = "This is my first arg {} and this is my second arg {}".format(sys.argv[1], sys.argv[2])
print(string)

#If you want to preserve the order of the messages
string ="This is the second arg {1} and this is the first arg {0}".format(sys.argv[1], sys.argv[2])
print(string)
EOF
echo "$(pbpaste)" > eg2.py

cat << "EOF" | pbcopy
import requests
import argparse

parser = argparse.ArgumentParser()

parser.add_argument(
    '--message', default='Hi there i have'
)

parser.add_argument(
    '--amount', default = 4, type=int
)
parser.add_argument(
    '--animal', default='cat'
)

known_args, other_args = parser.parse_known_args()

print(known_args)
print(other_args)
EOF
echo "$(pbpaste)" > eg3.py

cat << "EOF" | pbcopy
FROM continuumio/miniconda3:4.8.2
WORKDIR $HOME/src
COPY . $HOME/src
ENTRYPOINT ["python"]
CMD ["eg1.py"]
EOF
echo "$(pbpaste)" > Dockerfile

docker build -t dockerpy .
Docker Flask
Setup:
FROM continuumio/miniconda3:4.8.2
COPY . /app/
EXPOSE 5000
WORKDIR /app/
RUN pip install flask
CMD python app.py
from flask import Flask, request

app = Flask(__name__)
# wrapping the function up

@app.route('/get_add_fuc')
def get_add():
    a = request.args.get("a")
    b = request.args.get("b")
    return str(int(a) + int(b)), 200

@app.route('/add', methods=['POST'])
def add():
    data = request.get_json()
    a = data.get("a")
    b = data.get("b")
    return str(int(a) + int(b)),200


@app.route('/multiply', methods=['POST'])
def multiply():
    data = request.get_json()
    a = data.get("a")
    b = data.get("b")
    return str(int(a) * int(b)),200


if __name__ == '__main__':
    app.run(host='0.0.0.0',port=5000, debug=True)
mkdir docker_flask
cd docker_flask

cat << "EOF" | pbcopy
FROM continuumio/miniconda3:4.8.2
COPY . /app/
EXPOSE 5000
WORKDIR /app/
RUN pip install flask
CMD python app.py
EOF
echo "$(pbpaste)" > Dockerfile

cat << "EOF" | pbcopy
from flask import Flask, request

app = Flask(__name__)
# wrapping the function up

@app.route('/get_add_fuc')
def get_add():
    a = request.args.get("a")
    b = request.args.get("b")
    return str(int(a) + int(b)), 200

@app.route('/add', methods=['POST'])
def add():
    data = request.get_json()
    a = data.get("a")
    b = data.get("b")
    return str(int(a) + int(b)),200


@app.route('/multiply', methods=['POST'])
def multiply():
    data = request.get_json()
    a = data.get("a")
    b = data.get("b")
    return str(int(a) * int(b)),200


if __name__ == '__main__':
    app.run(host='0.0.0.0',port=5000, debug=True)
EOF
echo "$(pbpaste)" > app.py
RUN:
docker build -t flaskapp .
docker run -it -p 5000:5000 flaskapp
For the GET request, go to your browser and enter the following url: http://127.0.0.1:5000/get_add_fuc?a=1&b=10.
For the POST request, either use postman or curl:
curl --location --request POST 'http://127.0.0.1:5000/multiply' \
--header 'Content-Type: application/json' \
--data-raw '{
    "a": 10,
    "b": 4
}'
Remote Development IDE
UPDATE! - There is now a realpython post on advance python usage with vscode, and it also mentiones about remote development with vscode using docker!
If you do not like notebooks, there are two IDE (that i am aware of) that allows for remote docker development.This allows you to use .py scripts in the docker container via an IDE.
The most significant benefits (in my opinion) are:
- Allows you to use
.py scripts which is better version control.
- The same docker file you used for development can be the same file you use for production - No more surprises!
- Your environment can be reproducible across different platforms & individuals.
Pycharm
Unfortunately, the remote docker development is only available in professional version.
Because of this, i will not cover on how to use it in this post, feel free to check it out
here.
Vscode
The support remote intepreter is one of the top requested features.
The Vscode team released this in 2019, featuring on the vscode blog
and ms devblog.
Here is a short gist to illustrate:
Show gist
Below are resources i found useful:
Vscode-Docker
Here is my walk-through at provide a "Data Science Workbench" with my mac as shown in the gist above.
Run the code below in your terminal in your base directory:
-
Env Setup
Chop Chop!
mkdir vscode-ds-workbench
cd vscode-ds-workbench

#create requirements
cat << "EOF" | pbcopy
pandas==1.0.3
numpy==1.18.1
matplotlib==3.1.3
EOF

echo "$(pbpaste)" > requirements.txt

#create requirements for extra step in devcontainer
cat << "EOF" | pbcopy
black
flake8
pytest
pylint
mypy
pydantic
jupyter
EOF

echo "$(pbpaste)" > requirements-test.txt

#example.py file
cat << "EOF" | pbcopy
import matplotlib.pyplot as plt
import numpy as np
def hello(x):
    print(x)
hello(10)
x = np.linspace(0, 20, 100)
plt.plot(x, np.sin(x))
plt.show()
EOF

echo "$(pbpaste)" > example.py

#Dockerfile
cat << "EOF" | pbcopy
FROM continuumio/miniconda3:4.8.2
WORKDIR $HOME/src
COPY requirements.txt $HOME/src
RUN pip install -r requirements.txt
EOF

echo "$(pbpaste)" > Dockerfile
-
Download Vscode here
- Install the plugin
ms-vscode-remote.remote-containers over here or search for it in plugins.
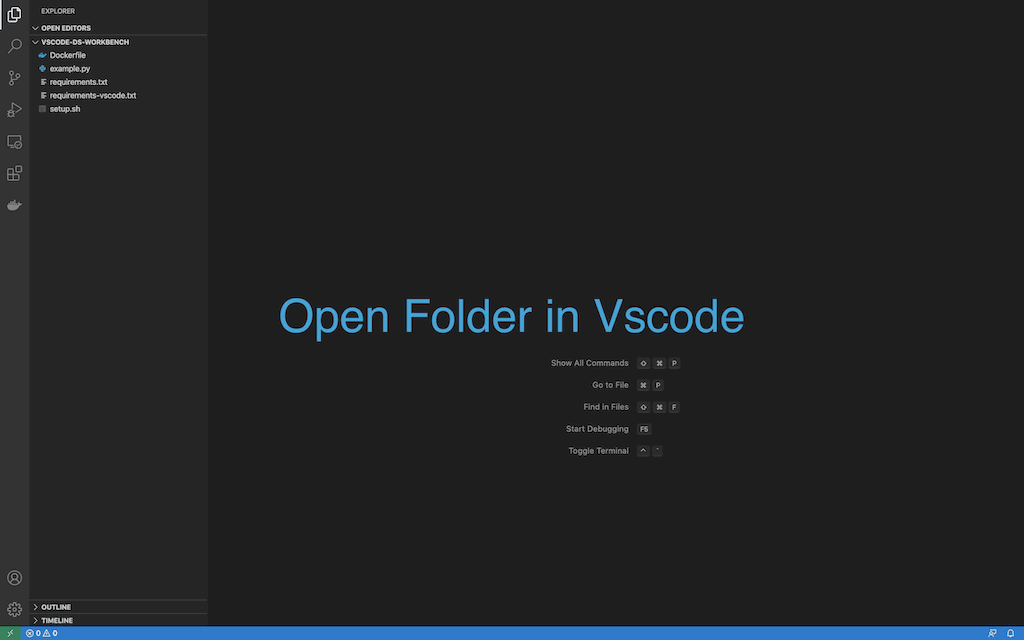
- Open the folder in vscode.
- Show all commands, and select
Remote-containers: Open Folder In Container
- Select
From 'Dockerfile' Option
- Docker image will start building and reopen in remote container.
-
Open .devcontainer and replace the devcontainer.json with the following:
Show json config
{
    "name": "Existing Dockerfile",
    // Sets the run context to one level up instead of the .devcontainer folder.
    "context": "..",
    // Update the 'dockerFile' property if you aren't using the standard 'Dockerfile' filename.
    "dockerFile": "../Dockerfile",
    // Set *default* container specific settings.json values on container create.
    "settings": {
        "terminal.integrated.shell.linux": null,
        "python.pythonPath": "/opt/conda/bin/python",
        "python.testing.unittestEnabled": false,
        "python.testing.nosetestsEnabled": false,
        "python.testing.pytestEnabled": true,
        "python.testing.pytestArgs": [
            "."
        ],
        "editor.formatOnSave": true,
        "python.linting.enabled": true,
        "python.linting.flake8Enabled": true,
        "editor.tabCompletion": "on",
        "python.dataScience.sendSelectionToInteractiveWindow": true,
        "python.formatting.provider": "black",
        "workbench.colorTheme": "Default Dark+",
        "python.linting.mypyEnabled": true,
        "python.linting.flake8Args": [
            "--max-line-length=88"
        ],
        "python.linting.pylintEnabled": true,
        "python.linting.pylintUseMinimalCheckers": false,
    },
    // Add the IDs of extensions you want installed when the container is created.
    "extensions": [
        "ms-python.python",
        "ms-python.vscode-pylance",
        "VisualStudioExptTeam.vscodeintellicode",
        "njpwerner.autodocstring"
    ],
    // Use 'forwardPorts' to make a list of ports inside the container available locally.
    "forwardPorts": [
        8888
    ],
    "postCreateCommand": "pip install -r requirements-test.txt &&apt-get update && apt-get install -y curl",
    // "runArgs": [
    //  "--env-file=env_file"
    // ],
    "shutdownAction": "stopContainer",
}
-
Show all commands, and select Rebuild Container
- Try to run the python script in
example.py. The output should appear in the Python Interactive panel on the right side.
Additional Readings
Docker for python developers by Michael Herman
References